3D Pumpkin Nail Art Designs to Try This Halloween – Step-by-Step Guide

As Halloween approaches, it’s time to elevate your nail game with some spooky and stylish designs. One of the most popular trends this season is 3D pumpkin nail art. Combining creativity with a touch of spookiness, 3D pumpkin nail art transforms your nails into mini canvases that celebrate the spirit of Halloween
In this guide, we’ll explore various techniques, designs, and tips to help you create stunning nail art that will leave everyone impressed.
Contents
Inspiration from Pumpkin Carving
Pumpkin carving has long been a beloved Halloween tradition. Drawing inspiration from these iconic designs can be a great starting point for your nails.

Classic Pumpkin Designs
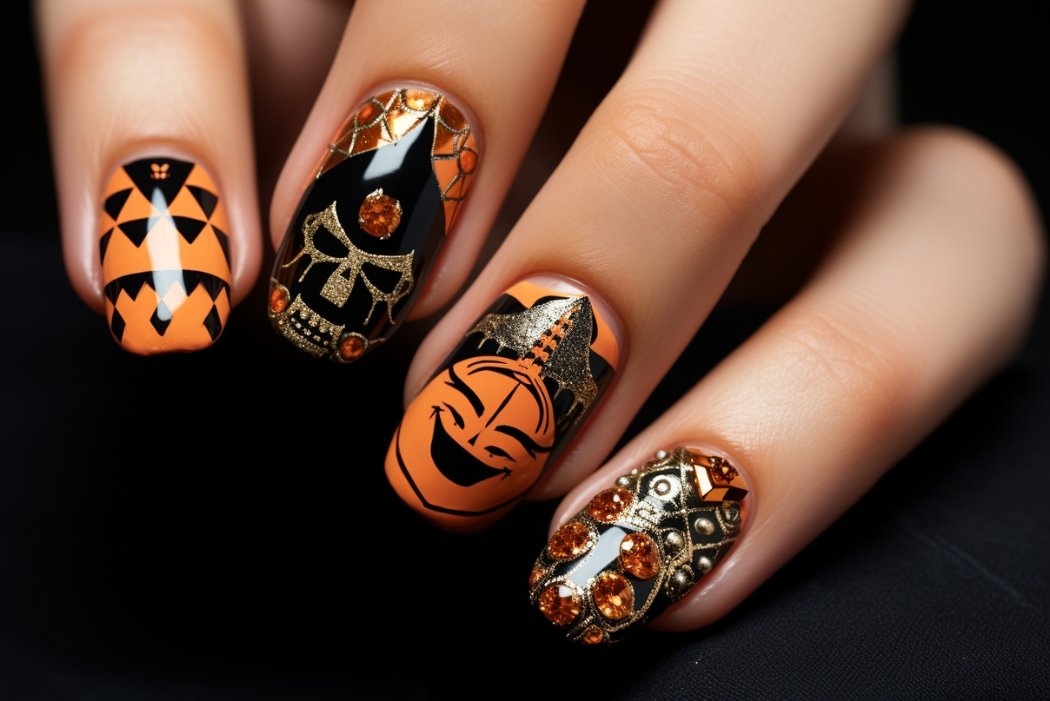
The traditional Jack-o’-lantern with its triangular eyes, nose, and jagged mouth is a classic motif that can be easily adapted to your nail art. By using acrylic or gel to create raised features, you can bring this familiar face to life on your nails, giving it a textured, three-dimensional appearance.

Modern Pumpkin Art
Modern pumpkin designs have evolved to include geometric patterns, abstract shapes, and even glittery finishes. For a contemporary twist on 3D pumpkin nail art, consider using a blend of chrome powder and airbrushing techniques to create unique textures that catch the light and add depth to your nails.

Pumpkin-Themed Characters
Characters like the friendly Jack-o’-lantern, a pumpkin spice latte, or even a cute pumpkin ghost can be incorporated into your nails. These designs not only add a playful element but also allow you to personalize each nail with different expressions and features.
Techniques for Creating 3D Pumpkin Nail Art
Creating 3D pumpkin nail art requires some specific tools and techniques. Let’s explore the essentials for both beginners and advanced nail artists.

Basic Techniques
- Sculpting with Acrylic: Acrylic is a popular medium for creating 3D elements due to its malleable nature. By molding the acrylic into pumpkin shapes, you can achieve a realistic, raised effect.
- Layering: Layering involves adding multiple coats of gel or acrylic to build up the design gradually. This technique is perfect for creating intricate pumpkin textures and details.
Advanced Techniques
- Airbrushing: For a smooth, gradient effect, airbrushing can be used to add shadow and highlights to your 3D pumpkin nail art. This technique helps in creating a more realistic and dynamic design.
- Sugar Gel: This unique product can be used to add a sugary texture to your pumpkin design, giving it a sparkly, frosted appearance that’s perfect for Halloween.
- Chrome Powder: Adding chrome powder to your pumpkin design gives it a shiny, metallic finish, making the pumpkins on your nails stand out even more.
Tools and Materials
For creating 3D pumpkin nail art, you’ll need the following tools:
- Acrylic powder and liquid
- Sculpting brush
- Gel polish
- UV/LED lamp
- Chrome powder
- Detailing brush for fine lines
Unique 3D Pumpkin Nail Art Ideas
Looking for some inspiration? Here are a few creative ideas to get you started on your nail art journey.

1. Pumpkin Patch
Create a miniature pumpkin patch on your nails by designing pumpkins of different sizes, shapes, and colors. Use greens and browns to add vines and leaves for a realistic effect.

2. Pumpkin Spice Latte
Celebrate the season with a nail design that replicates a pumpkin spice latte. Use brown and white acrylic to create a cup design, and add a touch of glitter for a frothy top.

3. Pumpkin Carving Contest
Design each nail with a different Jack-o’-lantern face to create a Halloween-themed pumpkin carving contest right on your fingertips. This playful design is perfect for parties and gatherings.

4. Pumpkin-Themed Accessories
Incorporate pumpkin-shaped charms, rhinestones, or stickers into your nails to add some extra flair. This is an easy way to elevate your design without needing advanced skills.

5. Pumpkin-Inspired Color Palettes
Experiment with various color combinations that evoke the feeling of autumn. Consider using a mix of oranges, purples, greens, and golds to create a unique, eye-catching design.
Step-by-Step Tutorial for 3D Pumpkin Nail Art
Creating your own pumpkin nails can be both fun and rewarding. Follow this simple step-by-step guide to get started.

Step 1: Choose a Design
Pick a design that fits your style. Whether it’s a classic Jack-o’-lantern, a pumpkin spice latte, or a spooky pumpkin face, choose something you can recreate with your skill level.
Step 2: Prepare Your Nails
Start by cleaning and filing your nails. Apply a base coat to protect your natural nails and provide a smooth surface for the art.
Step 3: Apply the Base Color
Choose a base color that complements your pumpkin design. Orange is the classic choice, but you can also experiment with other autumn shades like deep purples or metallic greens.
Step 4: Create the 3D Elements
Use sculpting techniques to create the 3D pumpkin shapes on your nails. Carefully mold the acrylic or gel into the desired shapes and allow it to set under a UV or LED lamp.
Step 5: Add Details
Use a fine brush to paint details like pumpkin vines, leaves, or faces. Incorporate rhinestones or glitter to give your nails a glamorous finish.
Step 6: Finish with a Top Coat
Seal your artwork with a high-quality top coat to ensure that your nails last longer and stay glossy.
Tips and Tricks for Perfecting 3D Pumpkin Nail Art

Creating stunning nail art requires practice and patience. Here are some tips to help you master the technique:
- Work in Layers: Building up your design in layers allows you to add more depth and detail to your pumpkin art.
- Use a Detailing Brush: For intricate designs, a fine detailing brush can help you create precise lines and patterns.
- Experiment with Colors: Don’t be afraid to mix different colors to create a more vibrant and dynamic pumpkin design.
- Practice Makes Perfect: The more you practice, the better you’ll get at creating smooth and detailed 3D elements.
Conclusion
3D pumpkin nail art is a fun and creative way to celebrate Halloween. With a little bit of practice and the right techniques, you can create beautiful designs that will impress your friends and make your nails the talk of the town. Whether you prefer a classic Jack-o’-lantern look or a modern twist, there’s no limit to what you can create. So, gather your supplies and get started on your pumpkin nail masterpiece today!
To complete your Halloween nail art journey, why not explore Dipology Nails’ website for high-quality dip powder kits that can help you achieve a long-lasting, salon-quality look at home? With their variety of colors, easy-to-use kits, and health-conscious ingredients, Dipology Nails offers everything you need to elevate your nail game.

Don’t forget to use these Dipology Nails coupons to get the best prices on your favorite products.
We’d love to see your creations! Share your nail designs on social media and tag us. Who knows, your design might just be the inspiration someone else needs this Halloween season!
Remember, nail art is all about expressing your creativity. Whether you’re a beginner or a seasoned pro, have fun with your 3D pumpkin nail art and let your nails shine this Halloween!


